

At a roof-to-wall intersection, a small gap is not a defect. It is part of the drainage system.
J-channel, siding, and exposed roofline trim should never be pressed tightly against the roof surface or sealed shut with caulk. They need to be held slightly above the roof so water that gets behind the siding has a clear path to drain back out.
That principle is easy to overlook because a flush, tightly caulked joint looks cleaner. But roofs and walls are not designed as perfectly watertight surfaces. They are water-management systems. Good construction assumes that some water will get behind the exterior cladding. Flashing, housewrap, siding laps, and drainage gaps are supposed to direct that water down and out before it reaches the wall sheathing.
Close the exit, and the water is trapped exactly where it can cause the most damage.
Water will get behind the siding
Siding is an exterior cladding, not the building’s primary waterproof barrier. The weather-resistive barrier behind it, along with properly integrated flashing, protects the sheathing.
There are several ways water can get behind siding and trim.
Wind-driven rain
This is especially important on the Delmarva Peninsula. During a nor’easter or strong coastal storm, sustained northeast winds can push rain sideways and upward. Water can work behind lap siding, enter J-channel pockets, and reach roof-to-wall intersections in ways that ordinary falling rain does not.
That is why a roofline may remain dry during a light summer shower but leak during a storm with strong wind from a particular direction.
Capillary action
Water does not always need gravity to move downward. Through capillary action, water can travel along narrow spaces and cling to adjacent surfaces. A tightly installed piece of flashing or trim can create the very hairline gap that draws water inward.
The tighter the joint looks, the more likely it may be to hold water if the drainage design is missing.
Aging sealant
Caulk and other sealants are maintenance materials. They eventually shrink, crack, separate, or lose adhesion because of temperature changes, ultraviolet exposure, and building movement.
Once a caulked joint fails, water will enter. If the joint was designed with an open drainage path, that water can escape. If the bottom of the joint was sealed shut, the water may remain trapped against the siding, sheathing, and framing.
This is the same reason the bottom edge of shingles should not be sealed. If water gets beneath a shingle and the lower edge is glued shut, it has nowhere to go except into the roof deck.
The correct roof-to-wall assembly
The exact details vary by roof covering, siding type, wall construction, and manufacturer instructions. However, the basic sequence should allow water to move down and out through every layer.
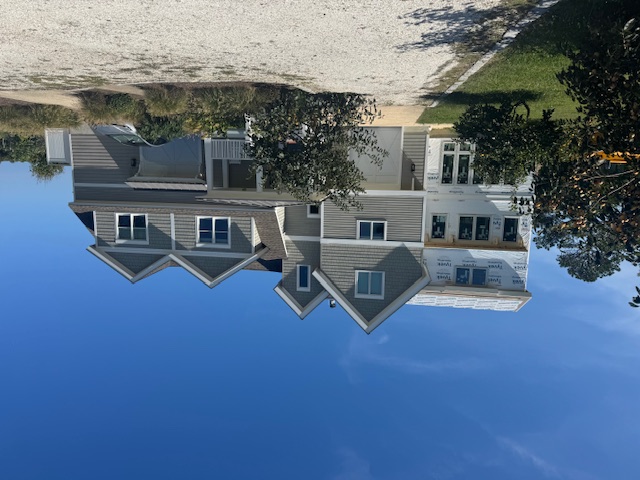
1. Step flashing goes in with the shingles
At a sidewall intersection, step flashing consists of individual L-shaped pieces installed with each course of shingles. A common detail uses pieces that extend at least 4 inches up the wall and at least 4 inches out over the roof deck.
The pieces must be interwoven with the shingles, not simply face-nailed over the finished roof. Each shingle course should shed water onto the step flashing below it, and each piece should direct that water toward the roof surface.
Step flashing is the primary water-control layer at the intersection. J-channel is not.
2. Let the roof and wall move independently
Roof and wall assemblies expand, contract, settle, and move at different rates. Step flashing should be secured according to the roofing system’s requirements without rigidly fastening the roof and wall together in a way that restricts movement.
In many standard shingle details, the flashing is secured with a nail to the roof deck rather than fastened through both legs into the wall. The exact fastening method should follow applicable code and manufacturer instructions, but the principle remains: do not create a rigid connection that can pull flashing loose as the building moves.
3. The wall cladding laps over the flashing
The siding, counterflashing, and weather-resistive barrier should be layered in a shingle-fashion arrangement. The upper layer laps over the lower layer so that water behind the siding lands on the flashing and is directed outward.
The weather-resistive barrier must also be properly integrated with the flashing. It is not enough to install metal at the roofline and then cover it with siding. Water must have a continuous route from the back of the siding to the flashing and then back outside.
4. Keep the J-channel and siding above the roof
The J-channel is finish trim. Its job is to receive and hold the cut edge of siding. It is not the primary waterproofing component.
At a sloped roofline, the J-channel and siding should be held above the shingles with a visible, continuous separation. The exact clearance depends on the siding and roofing products, but common vinyl siding instructions call for at least a 1/2-inch gap between the J-channel and roofing material. Some assemblies use a larger working clearance, often roughly 1 to 2 inches at the siding edge.
Always follow the instructions for the specific siding product. The important point is that the gap must exist, remain open, and not be filled with a continuous bead of caulk.
The Georgia-Pacific vinyl siding installation guide, for example, cautions against placing vinyl J-channel directly against roofing shingles and identifies clearance as necessary to avoid heat distortion and water siphoning.
5. Add kick-out flashing at the bottom
At the lower end of the roof-to-wall intersection, water needs to be thrown away from the wall and into the gutter or clear of the siding.
That is the purpose of kick-out flashing. Without it, concentrated runoff can run down the sidewall, behind the siding, and into the sheathing. A kick-out must be properly integrated behind the siding and with the weather-resistive barrier. It should not be treated as a decorative piece added after the siding is complete.
What a failed detail looks like
You do not need to climb onto the roof to identify warning signs. From the ground, look at roof-to-wall intersections with binoculars. A professional inspection should involve hands-on examination, but these clues can tell you where to look.
Caulk along the top of the J-channel
A thick, continuous smear of caulk along the upper edge of J-channel is often a sign that someone tried to stop a leak by sealing the drainage exit.
Caulk may be appropriate in specific locations and with compatible materials, but it should not replace properly lapped flashing or block a designed weep path.
Rot or deterioration near the roofline
Look for:
- Rot at the bottom edge of siding
- Blistering or peeling paint just above the roof
- Swollen, warped, or soft siding
- Crumbling trim or sheathing
- Dark staining beneath the intersection
- Moss or persistent discoloration in a protected joint
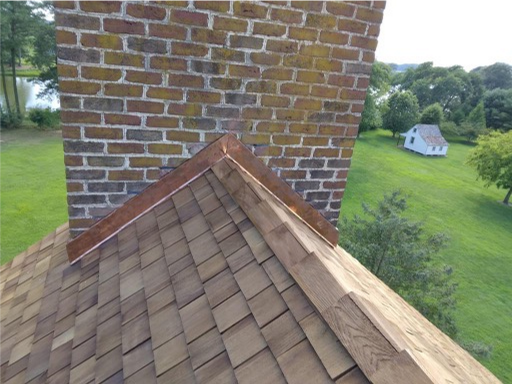
Leaks during wind-driven rain
Pay attention to when the leak occurs. Water stains directly below a roof-to-wall intersection that appear during wind-driven rain, but not during a calm, straight-down rainfall, can point to a flashing and siding drainage problem rather than a defect in the middle of the roof field.
That distinction matters. Replacing shingles without correcting the wall intersection may leave the actual leak untouched.
Hidden sheathing damage
If water has been wicking behind the siding for years, visible damage may be only the beginning. The sheathing, framing, insulation, and interior finishes may also be affected.
Delmarva’s humidity and coastal exposure can accelerate deterioration. Salt air, repeated wetting, and slow drying can shorten the useful life of exterior materials, while wood rot can progress out of sight behind otherwise attractive siding.
Why installers sometimes make this mistake
This failure is not always the result of careless work. A J-channel set tight to the roofline can look cleaner, and trimming it closely is faster.
Roofing and siding are also commonly handled by separate trades. The roofer may install step flashing up the wall, while the siding crew later cuts J-channel down to the shingles. If no one owns the transition between the two systems, the drainage gap can disappear.
Caulking can also feel like the safe choice. It appears to close the opening and protect the building. At this location, however, sealing the bottom edge often does the opposite: it prevents incidental water from escaping.
The cleanest-looking joint is not necessarily the best-performing joint.
Can this be repaired?
Often, this is a targeted repair rather than an automatic roof replacement. Depending on the condition, the work may include:
- Carefully removing the caulk or obstructing trim
- Opening the siding around the intersection
- Inspecting the existing step flashing
- Restoring or replacing galvanized steel or copper flashing
- Reintegrating the flashing with the weather-resistive barrier
- Reinstalling the siding and J-channel with proper clearance
- Adding or correcting kick-out flashing
- Replacing damaged siding, sheathing, or framing
If the wall has been absorbing moisture for a long time, hidden rot may only become visible once the assembly is opened. A proper repair should address that damage rather than covering it with new siding.
Temperature also matters. Repairs involving sealants or adhesives should generally be performed when temperatures are within the product’s installation range, often above 40 to 50°F, so the materials can bond and cure properly.
Inspect the whole assembly, not just the shingles
A “roof leak” is not always a shingle problem. At Peninsula Roofing Company, our inspections consider the roof-to-wall intersections, step flashing, siding termination, kick-out flashing, and drainage paths as one connected assembly.
A drone image may show the general roof condition, but it cannot reliably tell you whether a J-channel is caulked shut, whether flashing is properly lapped, or whether water can drain behind the siding. That requires an in-person inspection.
Peninsula Roofing Company has served Delmarva since 1947, providing residential and commercial roofing inspections, repairs, replacements, maintenance, and 24/7 storm response. We offer free in-person inspections and honest repair-versus-replace guidance, with financing options available for qualifying projects.
Whether you are comparing roofing companies in Salisbury, MD, looking for a roofer in Salisbury, or maintaining a property elsewhere across Delmarva, inspect these intersections before winter. If you see a flush J-channel, heavy caulk, staining, or damaged siding at the roofline, contact Peninsula Roofing to schedule an inspection of the roof-to-wall drainage detail.
For more information about our residential and commercial services, visit our roofing services page or learn more about Peninsula Roofing Company.
Water always needs a path out. At a roof-to-wall intersection, that path should never be sealed shut.